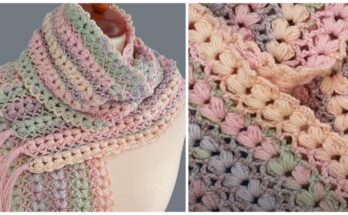
If you’re looking to add some dimension and plush texture to your crochet work, the puffy crochet stitch is a must-learn. This beautifully raised stitch creates a soft, cloud-like effect, making it perfect for cozy items like blankets, scarves, baby clothes, hats, and decorative accents. It’s also a favorite for giving amigurumi or bags a unique 3D feel.

Whether you’re a beginner ready to expand your stitch knowledge or a seasoned crocheter wanting to spice up your patterns, this stitch is both fun and easy to master.
🧵 What Is the Puffy Stitch?
The puffy stitch (also known as puff stitch) forms a soft, rounded cluster that stands out from the fabric. Unlike bobble or popcorn stitches, puff stitches are less dense and more “squishy,” giving a delightful texture without being too stiff.

📘 Abbreviations (US Terms)
- CH – Chain
- YO – Yarn Over
- ST – Stitch
- PUFF – Puff Stitch
🌟 Step-by-Step Instructions
🔹 Step 1: Start With a Foundation
- Begin with a foundation chain in any even number. For practice, CH 16.
- Row 1: SC (single crochet) in the second CH from hook and across. CH 1, turn.
🔹 Step 2: Begin the Puff Stitch
Let’s say you are now on Row 2.
- SC in the first stitch to keep the edge neat.
- Now, YO, insert your hook into the next stitch.
- YO again and pull up a loop — you now have 3 loops on your hook.
- Repeat the same process into the same stitch:
- YO, insert, YO, pull up a loop – now you have 5 loops.
- Again: YO, insert, YO, pull up a loop – 7 loops.
- Again: YO, insert, YO, pull up a loop – 9 loops (you’ve yarned over and pulled up loops 4 times total).
- YO one last time, and pull through all 9 loops on the hook in one smooth motion.
- CH 1 to close the puff stitch. This is important and acts as a stitch “lock.”

✅ Tip: Keep your loops loose while pulling them up to make it easier to pull through them all at the end.
🔹 Step 3: Repeat the Puff Pattern
- Skip the next stitch (to make room).
- SC in the following stitch.
- Then make another puff stitch in the next one.
- Continue across: PUFF, skip 1, SC repeat pattern.
- CH 1 and turn at the end of the row.
🔄 Sample Practice Pattern (Puff Stitch Row)
Foundation Chain: CH 16

Row 1: SC in 2nd CH from hook and across. CH 1, turn.

Row 2:
SC in 1st stitch,
*PUFF in next stitch (follow steps above), skip 1 stitch, SC in next stitch*
Repeat * to * across the row.
CH 1, turn.

Row 3:
Repeat Row 2.
🧶 Materials You Can Use
- Yarn: Works well with most yarn types, especially worsted, cotton, or baby yarns.
- Hook Size: Use a hook suitable for your yarn—larger hooks will give an airier look.
💡 Where to Use the Puffy Stitch
- Blankets: Create rows of puff stitches for a soft, textured blanket.
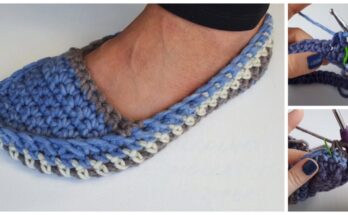
- Hats & Scarves: Add warmth and dimension to your winter accessories.
- Baby Items: Perfect for adding a cuddly look to baby clothes or toys.
- Decor: Use in pillows, coasters, or wall hangings for added texture.
🌈 Design Ideas
- Puff Flowers: Make floral motifs by placing puff stitches in a circle.
- Chevron with Puff Rows: Alternate puff rows with simple stitches like HDC or DC.
- Puff Stitch Granny Squares: A modern twist on classic squares.
✨ Conclusion
The puffy crochet stitch is a fun, beginner-friendly technique that instantly elevates your projects with soft, textured beauty. It’s endlessly versatile, making even the simplest items feel special and luxurious. Once you get the hang of it, you’ll find yourself using it everywhere!
Give your next crochet piece a soft, touchable flair—try the puffy stitch today! 🧶💫
Video tutorial: