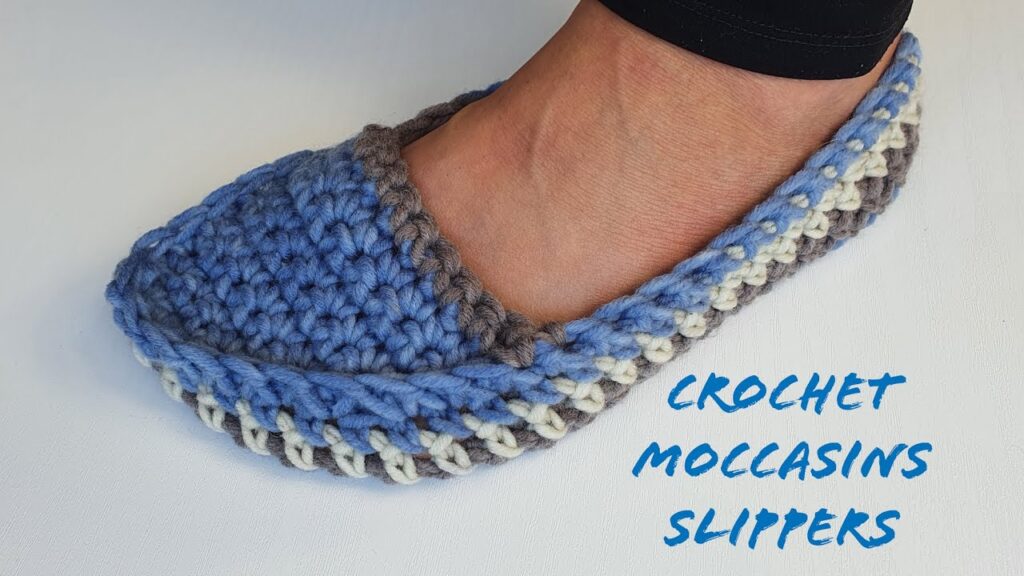
This pattern creates a cozy, moccasin-style slipper that is entirely seamless, thanks to a clever spiral construction method. The unique foundation technique allows you to customize the size for any foot—from child to adult, male or female.
🧶 Materials & Tools
| Item | Details |
| Yarn | Approx. 150-200g of Chunky/Bulky Weight (Category 5) yarn. |
| Hook | 5.0 mm crochet hook (or size needed to obtain a tight gauge with your yarn). |
| Notions | Scissors, Yarn needle, Stitch marker, Measuring tape. |
| Essential Prep | Before starting, measure and cut a long yarn tail (approximately 80 cm / 30 inches). This tail will be used later to sew the sole closed and is crucial to the design! |
🔍 Special Stitch Guide
This pattern relies entirely on one stitch for its unique texture:
Single Crochet Cross Stitch (SC-Cross)
The key difference from a standard Single Crochet is the way you yarn over.
- Insert: Insert your hook into the indicated stitch.
- Yarn Under: Bring the yarn under the hook (Yarn Under, or YU) and pull up a loop. (You now have 2 loops on your hook).
- Yarn Over: Bring the yarn over the hook (YO) and pull through both loops.
(This motion twists the yarn, making the vertical legs of the stitch cross, which tightens the fabric and prevents stretching.)
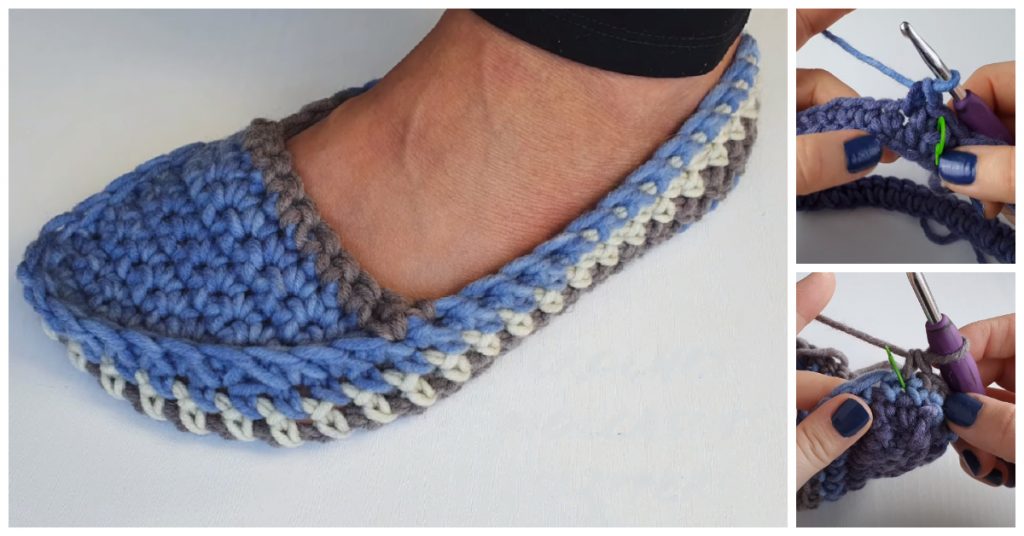
👣 Part 1: The Customized Foundation & Sole
The length of your slipper is determined entirely by your starting chain.
1. Measure Your Foot
- Using your measuring tape, measure the distance from the back of your heel to the tip of your second toe (the one next to your big toe).
- Example: For an EU Size 38, the video uses 25 chains.
2. The Initial Chain (Heel to Toe)
- Create a slip knot.
- Chain the number of stitches that corresponds to your measurement. This is Chain A.
3. The Return Chain (Toe to Heel)
- Place a stitch marker in the very last chain of Chain A.
- Chain the exact same number of stitches again. This is Chain B.
- If Chain A was 25 stitches, Chain B is 25 stitches, for a total of 50 chains in the foundation.
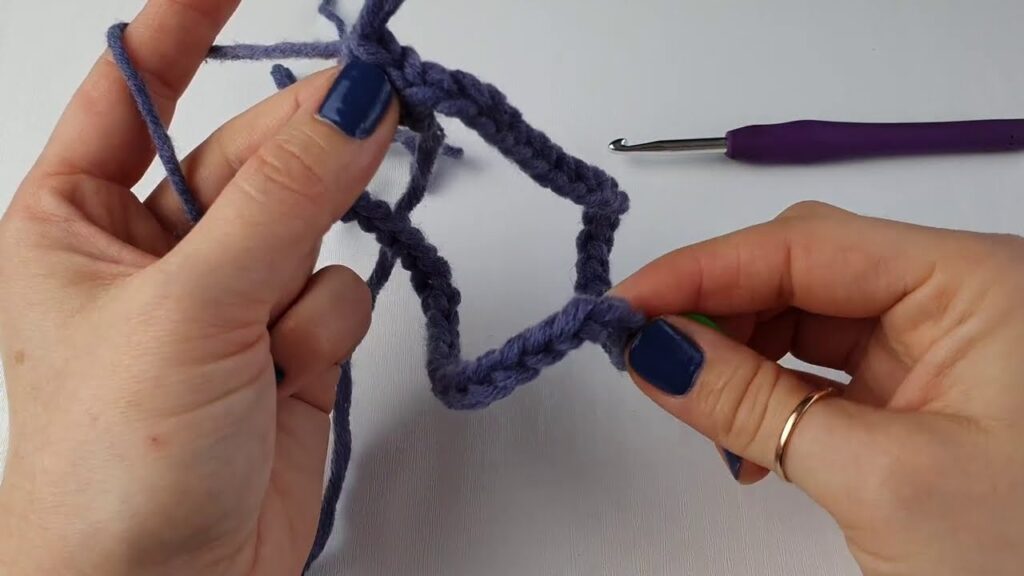
4. Forming the Loop
- Ensure your chain is not twisted (the “V”s are all facing up).
- Insert your hook into the stitch where your stitch marker is placed (the last stitch of Chain A).
- Sl St to join, forming a large loop.
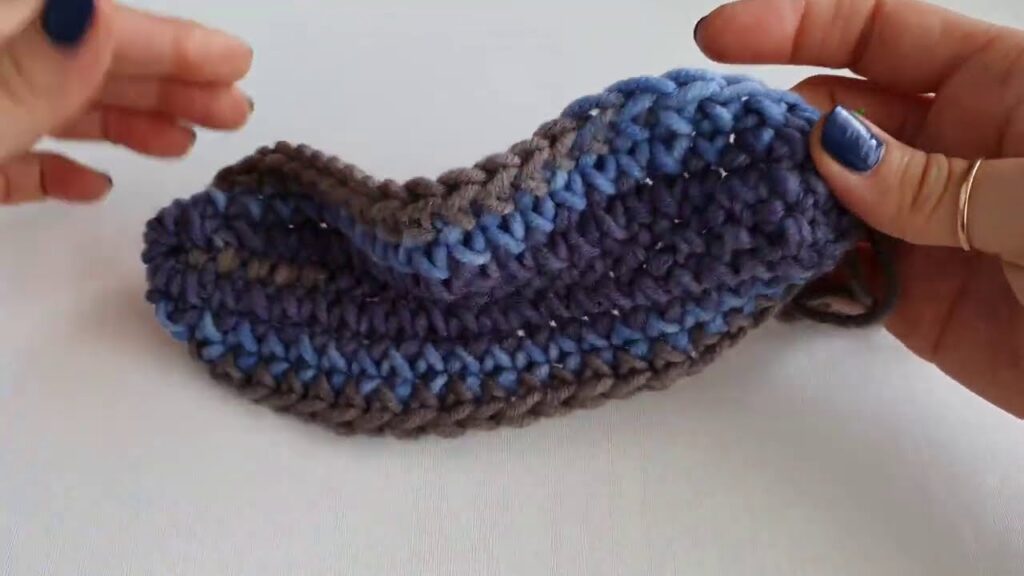
5. Rounds 1-3: The Seamless Base
- Do not Chain 1. We will work in a continuous spiral.
- Round 1: SC-Cross into the very first stitch of the loop and every stitch all the way around. (Total stitches = 2 x Chain A).
- Tip: Move your stitch marker to the first stitch of this round.
- Round 2: Continue in the spiral, working 1 SC-Cross into every stitch around.
- Round 3: Continue in the spiral, working 1 SC-Cross into every stitch around.
- Leave your yarn loop secure on the hook and place the work aside.
🛠️ Part 2: Sealing the Heel & Building the Foot
We now use that long yarn tail you left at the start to sew the back of the sole closed.
- Turn Inside Out: Turn the tube-like piece inside out.
- Fold: Fold the piece so the two sides of the tube are pressed together. The heel section you just crocheted should be at the bottom, and the two ends of your initial chain should meet.
- Seam the Heel: Thread the long starting yarn tail onto your yarn needle.
- Use a whipstitch or a Single Crochet Seam (as demonstrated in the video) to join the two sides together. The seam should run across the width of the tube for about 10-12 stitches, closing the flat side of the sole.
- Fasten off the tail and weave it in securely on the inside.
- Turn Right-Side Out: Flip the slipper right-side out. The closed section is the heel of your sole.
5. Rounds 4-6: Building Height
- Re-insert your hook into the live loop.
- Continue working in a spiral, 1 SC-Cross into every stitch around.
- Work 2 to 3 more rounds until the slipper reaches the height of your ankle/top of your foot (level with your little toe).
- The video uses a total of 6 rounds for this stage, but your exact number may vary based on yarn/size.
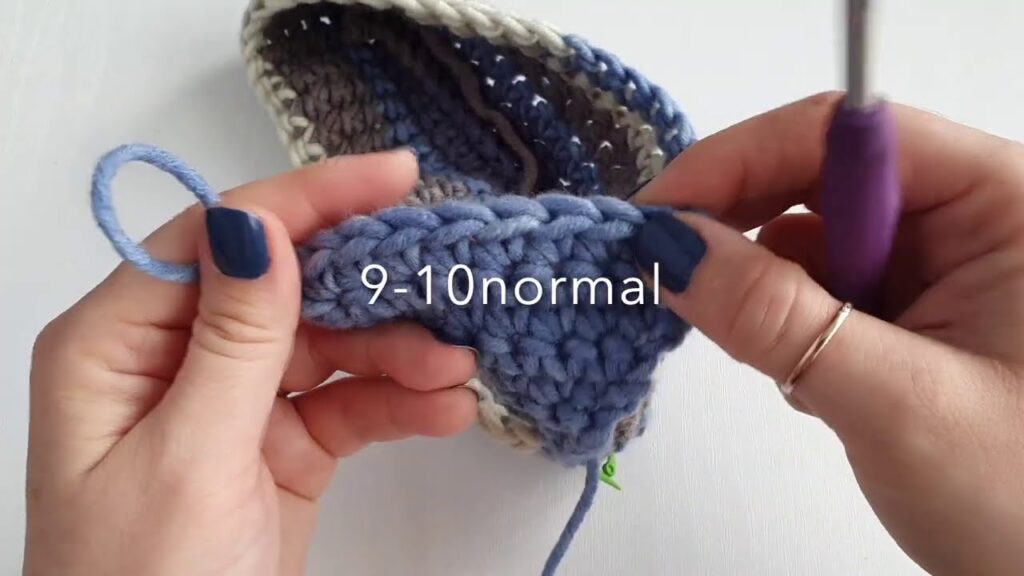
📐 Part 3: Shaping the Moccasin Flap (The “Tongue”)
We will now stop working in the round and switch to working flat, back and forth, to create the top part of the slipper.
- Find the Center: Locate the seam line you created at the heel. Count forward to the exact middle of the front toe area.
- Start the Flap (Row 1):
- Work 1 normal SC-Cross into the stitch directly on the center line.
- Work 1 normal SC-Cross into the next stitch. (2 stitches total).
- Chain 1 and Turn your work.
- Row 2 (Increase):
- Work 1 SC-Cross into the same stitch as the chain-1. (Increase).
- Work 1 SC-Cross into the next stitch.
- Work 2 SC-Cross into the last stitch. (Increase). (4 stitches total).
- Chain 1 and Turn.
- Row 3 (Increase):
- Work 1 SC-Cross into the same stitch as the chain-1. (Increase).
- Work 1 SC-Cross in each stitch across until the last stitch.
- Work 2 SC-Cross into the last stitch. (Increase). (6 stitches total).
- Chain 1 and Turn.
- Row 4 (Increase):
- Repeat Row 3: Increase at the start and end. (8 stitches total).
- Chain 1 and Turn.
- Row 5 (Increase):
- Repeat Row 3: Increase at the start and end. (10 stitches total).
- Stop increasing here for standard women’s sizes. (For men’s sizes, continue increasing two more rows to 14 stitches.)
- Chain 1 and Turn.
7. Rows 6-7: Straight Sides
- Work 1 SC-Cross into the same stitch as the chain-1 and 1 SC-Cross into every stitch across.
- You should maintain your final stitch count (e.g., 10 stitches for women’s).
- Chain 1 and Turn.
- Repeat for a second straight row (Row 7).
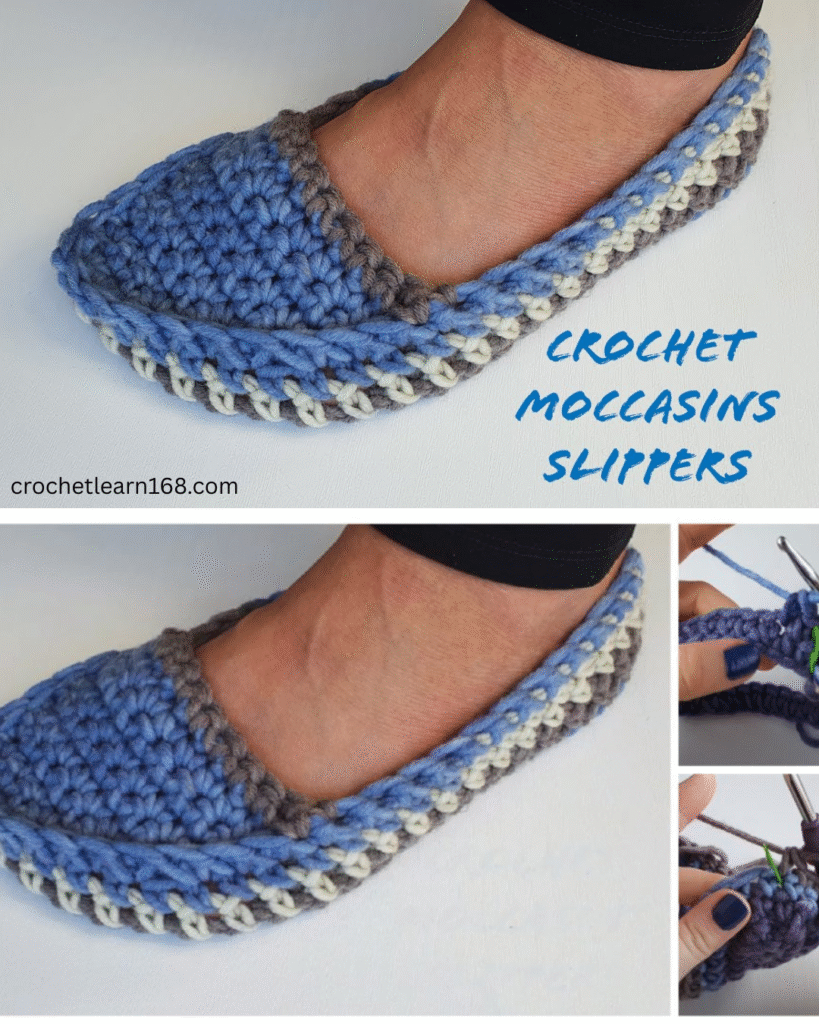
✨ Part 4: Final Assembly & Cuff
Now we join the flap back to the body and finish the ankle edge.
- Joining the Flap (Side Seam 1):
- Do NOT Chain 1.
- Insert your hook into the next stitch on the flap, then insert it into the next available stitch on the main slipper body (the side).
- Yarn over and pull through all loops to complete a Single Crochet join.
- Continue this joining seam down the side of the flap, using 1 SC to join each row-end of the flap to the body of the slipper.
- Across the Front Toe:
- When you reach the bottom of the flap, continue working 1 SC-Cross into every unworked stitch across the front of the toe, connecting the two sides of the flap.
- Joining the Flap (Side Seam 2):
- When you reach the other side, repeat the joining process up the side of the flap.
- The Ankle Cuff (Working Around):
- Continue working the SC-Cross stitch around the open ankle cuff.
- Heel Decrease: When you reach the exact middle back of the heel, we will decrease to ensure a snug fit:
- SC2Tog: Insert hook into the first stitch, YO and pull up a loop (2 loops on hook). Insert hook into the next stitch, YO and pull up a loop (3 loops on hook). YO and pull through all 3 loops.
- Repeat the SC2Tog decrease once more over the next two stitches.
- Continue working 1 SC-Cross into every stitch around the cuff until you reach the start of the row.
- Final Seam: Sl St into the first stitch of the cuff row to join.
- Fasten off and weave in all remaining ends.

Safety Note: Crochet and knit slippers can be very slippery on hard floors. Please consider applying a non-slip treatment (such as puff paint or a liquid latex product) to the soles for safety.
Video tutorial: