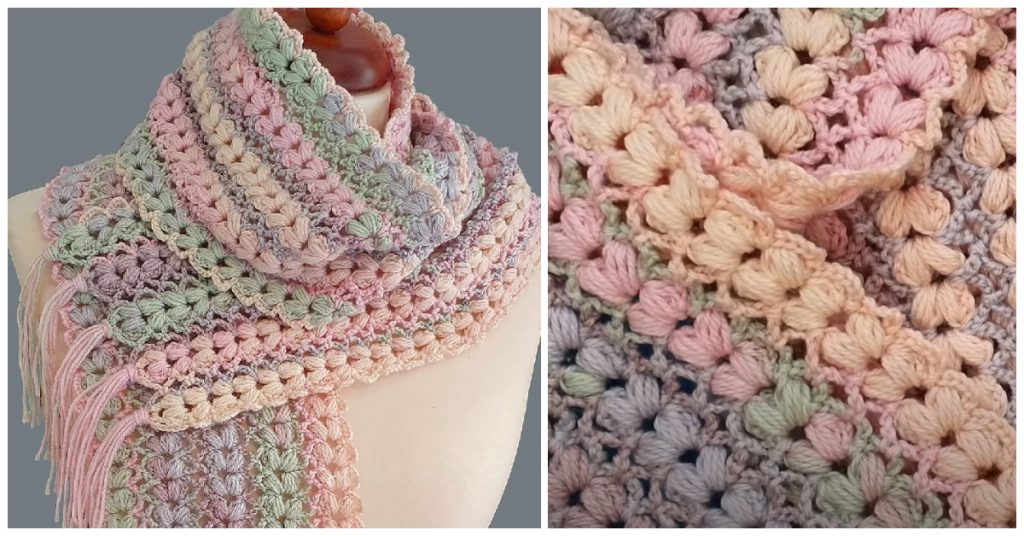
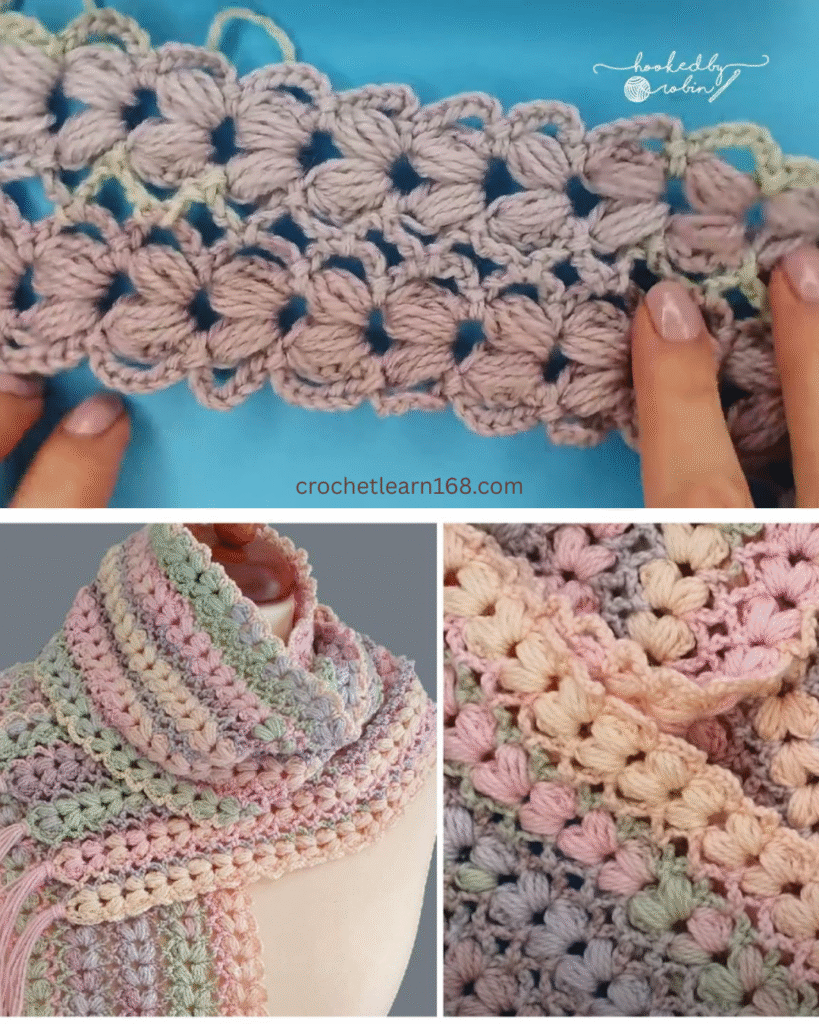
This stunning scarf uses the classic “Mile-a-Minute” construction method, which creates long, luxurious strips that are then joined together. The repetitive nature of the Puff Stitch makes this an easy, rhythmic project that produces a thick, textured fabric reminiscent of elegant Art Deco design.
The length is fully customizable, and the resulting drape is perfect for an oversized scarf or a cozy infinity cowl.
🧶 Materials & Sizing Notes
| Item | Details |
| Yarn | 2-3 balls (approx. 400g-600g total) of Aran/Worsted Weight (Category 4) or Light Chunky (Category 5) yarn. (The video uses King Cole Beaches DK held double, but a single strand of chunky yarn is recommended for efficiency.) |
| Hook | 4.5 mm (US G/7) or 5.0 mm (US H/8) crochet hook. Use the larger hook if your puff stitches feel too tight. |
| Notions | Scissors, Yarn needle, Ruler/Measuring tape. |
Sizing and Customization
| Measurement | Detail |
| Finished Width | Determined by the number of strips. (Video uses 5 strips for a wide, blanket-like scarf.) |
| Finished Length | Determined by the number of Puff Stitch Rows per strip. (Video uses 160 rows for a very long scarf.) |
| Length Guide | For a 60-inch (150 cm) scarf, aim for approximately 80-100 puff rows per strip, depending on your tension. |
US Crochet Terminology:
- Ch: Chain
- Sl St: Slip Stitch
- SC: Single Crochet
- YO: Yarn Over
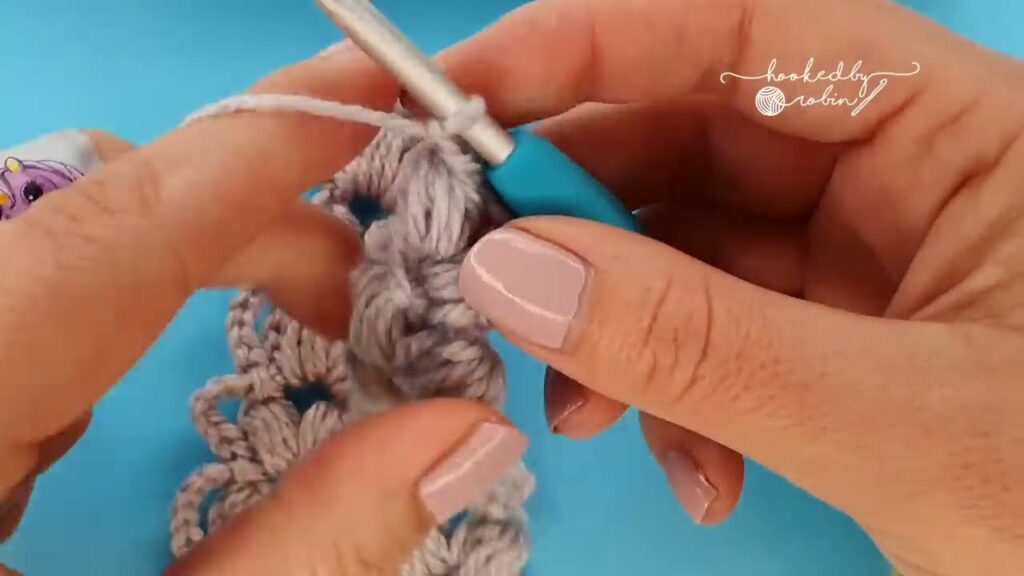
☁️ Special Stitch: The 4-YO Puff Stitch
This stitch creates a fat, dense puff, perfect for a cozy scarf.
- YO, insert hook into the designated space, YO and pull up a loop. (3 loops on hook)
- Repeat step 1 3 more times into the same space. (You now have 9 loops on your hook: the starting loop, and 4 sets of YO/pulled loops).
- YO and pull through all 9 loops on the hook.
- Ch 1 to lock the puff in place. (The lock chain is important—do not skip it!)
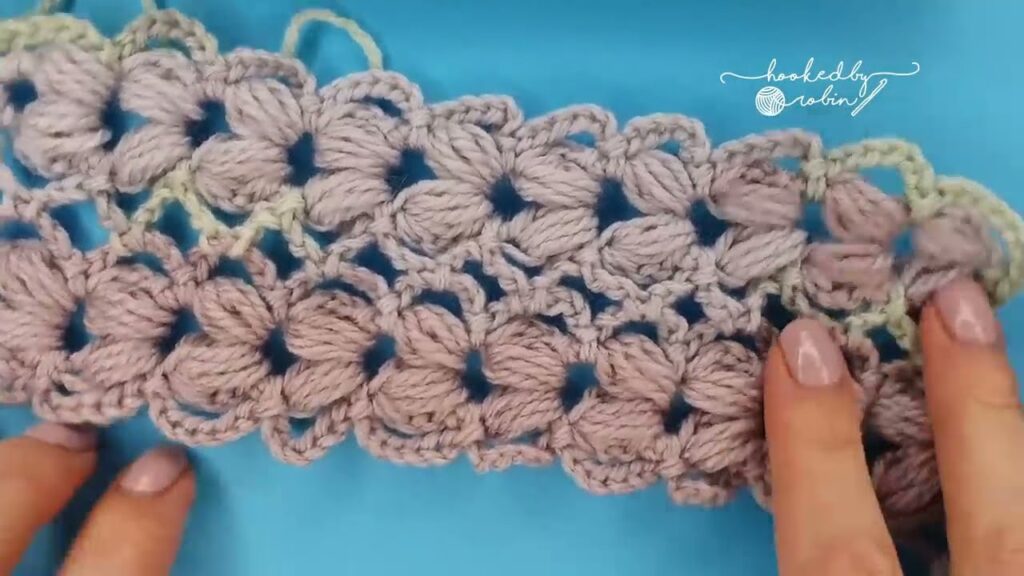
Part 1: Crocheting the First Strip (The Foundation)
We will work back and forth to create one long strip of continuous V-shaped puff stitches.
Foundation:
- Make a slip knot and Ch 5.
- Sl St into the very first chain made to form a small ring.
Row 1:
- Ch 2 (does not count as a stitch).
- Work a 4-YO Puff Stitch into the center ring.
- Ch 3.
- Work a second 4-YO Puff Stitch into the center ring.
- Ch 1 to lock the second puff.
- Turn your work.
Rows 2 – Final Length:
- Sl St into the Ch 3 space from the previous row.
- Ch 2.
- Work a 4-YO Puff Stitch into the Ch 3 space.
- Ch 3.
- Work a second 4-YO Puff Stitch into the same Ch 3 space.
- Ch 1 to lock the second puff.
- Turn your work.
- Repeat this sequence until you have reached your desired length (e.g., 100 rows).
Part 2: Edging Strip 1 (The Chain Loops)
The first strip needs a full border of chain loops to prepare for joining.
- Preparation: At the end of your final puff row, Turn your work, and Sl St into the Ch 3 space.
- Top Edge (Start): Ch 1, and work 2 SC into the Ch 3 space.
- Working Down the Side:
- Ch 7.
- Rotate your work 90 degrees and Sl St into the space between the two puffs of the next row down.
- Repeat this sequence (Ch 7, Sl St between puffs) all the way down the entire long edge of the strip.
- Bottom Edge (End):
- Once you reach the last puff row, Ch 7.
- Work 2 SC into the original starting Ch 5 ring.
- Working Up the Other Side:
- Ch 7.
- Rotate your work and Sl St into the space between the two puffs of the first row up.
- Repeat this sequence (Ch 7, Sl St between puffs) all the way up the second long edge of the strip.
- Join: Ch 7, and Sl St to join in the very first SC you made.
- Fasten Off: Ch 1, cut the yarn, leaving a long tail if you plan to add fringe later.
Part 3: Joining Subsequent Strips (The Join-As-You-Go Method)
Create your second strip exactly like the first (Part 1), but when you edge it (Part 2), you will join it to the previous strip as you go.
- Preparation: Complete the entire puff strip (same number of rows as Strip 1). At the end, Turn your work, and Sl St into the Ch 3 space.
- Top Edge (Start): Ch 1, and work 2 SC into the Ch 3 space.
- Joining Down the Side: Lay Strip 1 and Strip 2 side-by-side, facing the same direction.
- Ch 3.
- Join: Insert your hook into the first corresponding Ch 7 loop on Strip 1 and make a Sl St to join.
- Ch 3.
- Sl St into the space between the two puffs of the next row down on Strip 2.
- Repeat this sequence (Ch 3, Sl St into Strip 1 loop, Ch 3, Sl St into Strip 2) all the way down the entire long edge of Strip 2.
- Bottom Edge (End):
- Ch 3, Sl St into the final corresponding Ch 7 loop on Strip 1.
- Ch 3.
- Work 2 SC into the original starting Ch 5 ring of Strip 2.
- Working Up the Other Side (No Join):
- Work this side exactly as in Part 2, without joining.
- Ch 7, Sl St between puffs on Strip 2. Repeat all the way up the edge.
- Finish: Ch 7, and Sl St to join in the very first SC you made.
- Fasten off, weave in ends.
Repeat Part 3 for every subsequent strip until your scarf reaches the desired width.

💖 Finishing Touches
- Weave in Ends: Use a yarn needle to carefully weave in all the starting and finishing tails along the puff stitches to secure them.
- Blocking: Gently wash or steam block the scarf to relax the yarn, even out the strips, and enhance the drape and texture.
- Fringe (Optional): If you left long tails at the ends, incorporate them into a traditional knotted fringe. If not, cut new yarn strands (two or three strands together) to twice the desired fringe length. Loop them through the two SC stitches at each end of the strip and knot to secure.
- Infinity Cowl Conversion (Optional): If you prefer a cowl, seam the two short ends of the entire scarf together using a Sl St or whipstitch join.
Video tutorial: