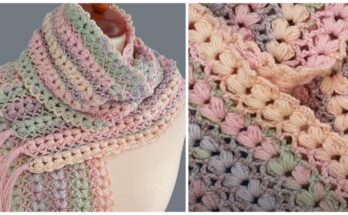
Crochet fingerless gloves are the perfect blend of functionality and style—offering warmth while leaving your fingers free for everyday tasks. When paired with the shell stitch, a classic and decorative crochet technique, they become beautiful accessories suitable for chilly days, gifting, or even craft market sales.
In this article, you’ll learn how to create elegant crochet fingerless gloves using the shell stitch—complete with detailed instructions, stitch explanations, design variations, and customization tips.

🧤 Why Choose Shell Stitch for Gloves?
The shell stitch is known for its fan-like clusters of stitches that create a lacy, feminine texture. When used in fingerless gloves, it adds stretch, comfort, and visual interest. It’s also easy to memorize once you’ve done a few rounds, making it ideal for beginners and intermediate crocheters alike.
🧵 Materials Needed
| Item | Details |
|---|---|
| Yarn | DK or worsted weight yarn (size 3 or 4) – soft wool or acrylic |
| Hook | 4.0 mm to 5.0 mm (G or H hook depending on yarn weight) |
| Scissors | For trimming yarn |
| Tapestry needle | For weaving in ends |
| Stitch markers | Optional, to mark the thumb space |
| Measuring tape | To ensure fit around your hand |
✨ Skill Level
🧶 Beginner to Intermediate
This pattern is perfect if you’re comfortable with basic stitches like single crochet, double crochet, and chain stitch, and you’re ready to expand into stitch patterns.

🔁 Stitch Glossary (US Terms)
| Abbreviation | Stitch Name |
|---|---|
| ch | Chain |
| sc | Single Crochet |
| dc | Double Crochet |
| sl st | Slip Stitch |
| sk | Skip |
| st(s) | Stitch(es) |
🪡 Shell Stitch Explained
A shell stitch typically consists of 5 double crochets in one stitch, followed by a skip of 2 or 3 stitches, then another shell. It forms a scalloped or fan shape.
Basic Shell Pattern:
- Shell: Work 5 dc into the same stitch.
- Skip 2 stitches.
- Sc in next stitch.
- Skip 2 stitches, 5 dc in next.
- Repeat across.
✋ Fingerless Glove Construction Overview
These gloves are made in the round, working from the wrist upward. The thumb hole is created by working back and forth for a few rows, then rejoining to continue in the round.
📏 Sizing and Fit
You can adjust this pattern for:
- Teen/Small Adult – 6″–6.5″ palm circumference
- Medium Adult – 7″–7.5″
- Large Adult – 8″–8.5″
✅ Measure around your palm (just below the knuckles, excluding thumb) and adjust the initial foundation chain accordingly in multiples of 6 + 1.
🧤 Crochet Fingerless Gloves with Shell Stitch: Step-by-Step Pattern
🪢 Step 1: Create Foundation Chain
- Chain 31 (or a multiple of 6 + 1 to match the desired width around your hand).
- Join with a slip stitch to the first ch to form a ring. Be careful not to twist the chain.

🔄 Step 2: Cuff (Optional Ribbed Section)
You can work a simple cuff for a snug fit.
- Ch 1, sc in each ch around. Sl st to join.
- Repeat for 2–3 rounds for a clean edge.

🌊 Step 3: Start Shell Pattern
Round 1:
- Ch 1 (does not count as a stitch),
- Sc in first stitch,
- Skip 2 sts, 5 dc in next stitch (shell made), skip 2 sts, sc in next,
- Repeat around. Sl st to join to first sc.
Round 2:
- Sl st into first 2 dc of shell to position hook in the center,
- Ch 1, sc in center dc of previous shell,
- Skip next 2 dc, shell (5 dc) in sc from previous round, skip next 2 dc, sc in center of next shell,
- Repeat around. Sl st to join.
👉 Continue this alternating shell-and-sc pattern for 6–8 rounds, or until you reach the base of your thumb.

👍 Step 4: Creating the Thumb Hole
When your glove reaches the base of the thumb, create a thumb opening:
Next Row: (Worked flat)
- Do not join round.
- Ch 1, continue pattern back and forth instead of in the round, for 2–3 rows.
- At the end of each row, turn your work.
This creates a small slit for your thumb.
🔄 Step 5: Rejoin in the Round
Once the thumb gap is tall enough:
- Rejoin ends by slip stitching across the thumb opening.
- Resume working in the round with the shell pattern for another 2–3 rounds (or as long as desired).
🧷 Step 6: Finishing the Top Edge
For a clean edge, finish with:
- 1 round of single crochet,
- Or, a reverse single crochet (crab stitch) for a decorative border.

🧤 Step 7: Make Second Glove
Repeat all steps for the second glove. The gloves are symmetrical and don’t require separate left/right instructions unless you add embellishments.
🧺 Finishing Touches
- Weave in ends using a tapestry needle.
- Block your gloves if needed to even out the shell stitches.
- Add decorative buttons, ribbons, or edging to personalize your project.
🎨 Variations & Customizations
| Feature | Options |
|---|---|
| Yarn Type | Use variegated yarn for multicolor shells or hand-dyed yarn for richness |
| Cuff Style | Ribbed (fpdc/bpdc), ruffled, or lace trim |
| Length | Make wrist-length, elbow-length, or even shoulder-length |
| Thumb Style | Add a full thumb gusset using sc or dc rounds |
| Embellishments | Add beads, appliqués, or surface crochet |
🧠 Tips for Success
- Keep tension consistent to ensure even stitch definition.
- Try the glove on as you go for the perfect fit.
- Adjust the number of chains in the foundation to size up or down.
- Use lighter weight yarn for a more delicate, lacy glove.
❤️ Why You’ll Love These Gloves
- Quick to make – A pair can be finished in an evening.
- Beginner-friendly – Only basic stitches used.
- Highly customizable – Great stash buster project.
- Elegant and cozy – The shell stitch looks intricate but is easy to master.
📘 Conclusion
Crochet fingerless gloves with shell stitch offer an ideal blend of comfort, warmth, and elegance. They’re small enough to be a portable project, yet beautiful enough to become your favorite winter accessory—or a thoughtful handmade gift.
Once you’ve mastered one pair, you’ll be tempted to make them in every color, using different yarns and variations of the shell stitch. Whether you’re crocheting for yourself, a friend, or to sell at your next craft fair, these gloves are sure to impress.
Video tutorial: